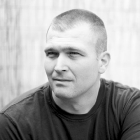
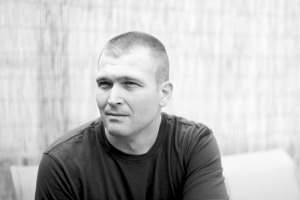
The image at left is a recent self portrait. To give you some ideas about things to consider before a portrait shoot, I thought I would try to give you some insight into my thought process on setting up this shot, and details about the actual execution of the shoot.
To start, I am not crazy about the typical “photographer holding a camera while looking in the mirror” self portrait. It can be very limiting in terms of both location and lighting. Instead, I wanted a portrait in a real location using available light. This is my standard operating procedure for any other portrait, why should a self portrait be any different?
As a location, I chose the back deck on my home in Westminster, CO. My family and I spent a good portion of the early summer refurbishing and adding on to the deck, so I thought it would be an ideal location. The north end of the deck is only a few feet from my neighbor’s yard, so we put up six foot reed fencing along this railing to provide privacy. The reed fencing served as the background that you see in the image. Now, if a fence on the north end of the deck served as the background, that tells us that I was facing South when the image was exposed. Normally this wouldn’t be an ideal lighting situation. Fortunately, I planned ahead and shot this image in the late afternoon, and my house blocked the direct light from the sun. So I was lit by the open sky, and fill light was provided by the light gray walls of my house.
For wardrobe, I chose a medium blue shirt. I wanted something that would separate from the background, but would not be too dark and contrasty. Also, I had a haircut a couple days before the shoot. If I go too long without a haircut, my hair naturally grows to a point and it starts to look like I am trying for a mohawk.
For this self portrait, I knew that I wanted to use shallow depth of field to blur the background and draw attention to my eyes and face. To accomplish this, I decide to shoot the image digitally. Using the self timer to expose the image, and shooting film, I wouldn’t know if the pictures were in focus until I got the film back from the lab.
To create the image, I set up my Nikon D70s on a tripod with a 50mm f1.4 lens attached. I set the ISO to 200, the aperture to f1.4 and the shutter speed to 1/1600 of a second. In the shot, I am sitting in a chair and leaning forward on our patio table (the table is not visible). I pre-focused the lens on the edge of the table and then recomposed the shot to cut out the table and give some room above my head. Finally, I set the self timer for 10 seconds, pushed the shutter release and ran over to my chair and sat down. I then leaned in and tried to position my eyes directly over the edge of the table. Before the shutter tripped I just needed to put on an expression that didn’t make me look like a total dork, no easy task. I eventually ended up going through this series of steps about ten times to get a few frames that I liked.
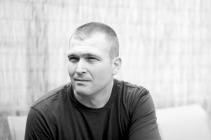
A couple of things that I particularly liked about this frame. I am looking off camera which seems a little more natural, and I only have a half smile, making me seem approachable but not too dorky. Also, this frame looks good as a horizontal (how it was shot), or cropped as a vertical or square…
 This is something important to think about when you will be repurposing the image across the web.
You can view the image “in action” over here on my About page, or on my Facebook fan page.
Tech Info:
Nikon D70s
Nikon 50mm f1.4
ISO 200, f1.4, 1/1600
B&W conversion in Adobe Camera Raw


