Tag Archives: family

Arvada, CO | Kids Portraits | Airplanes, Wagons & A Big Bruise

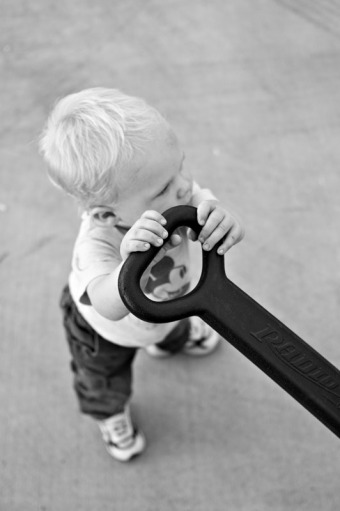
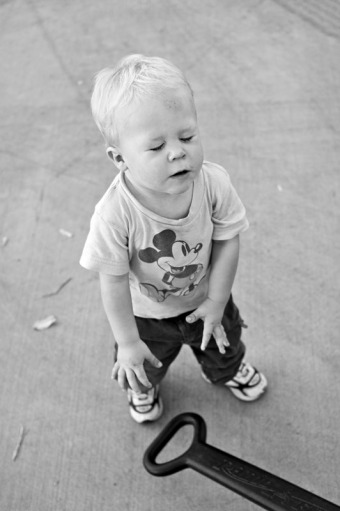
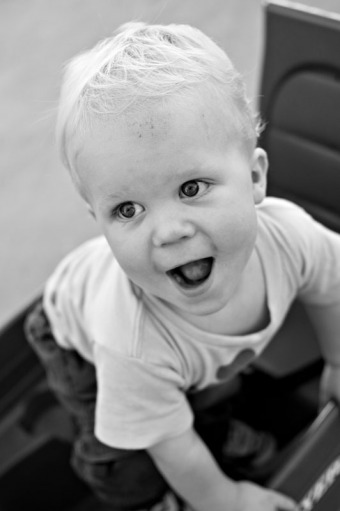
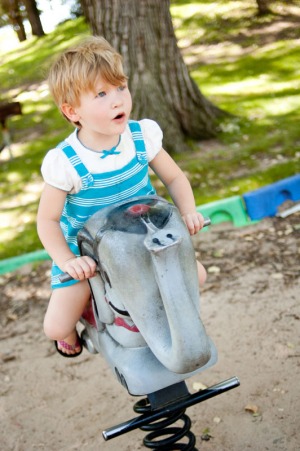
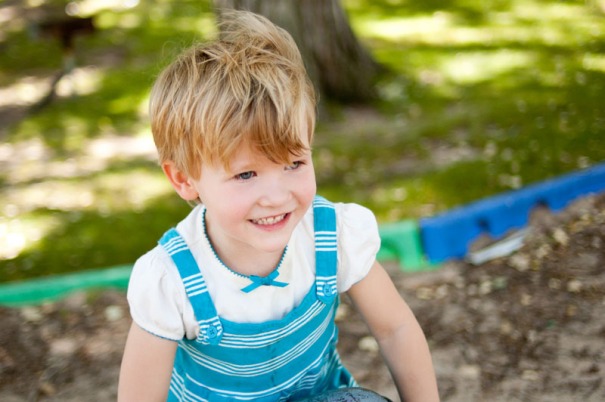
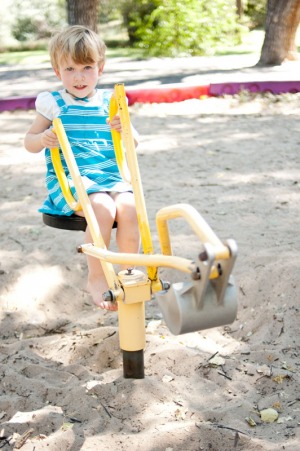
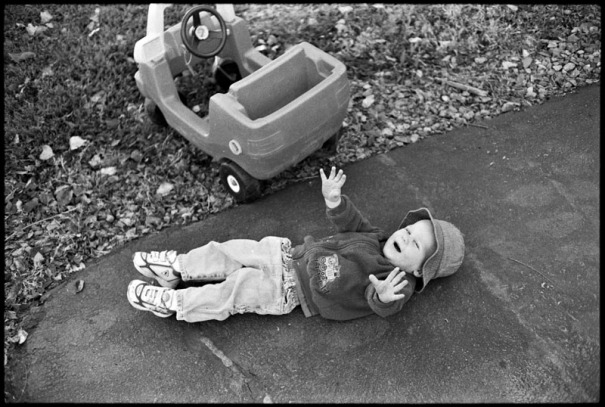
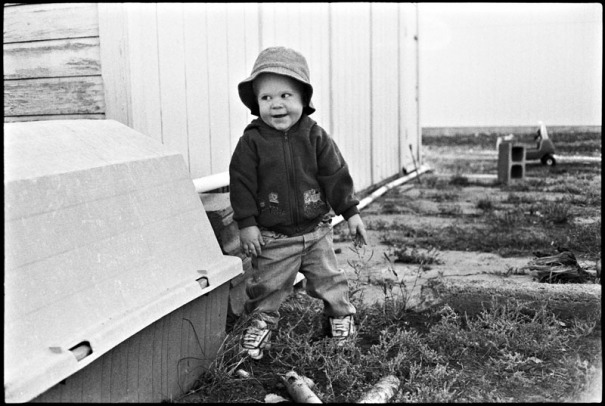
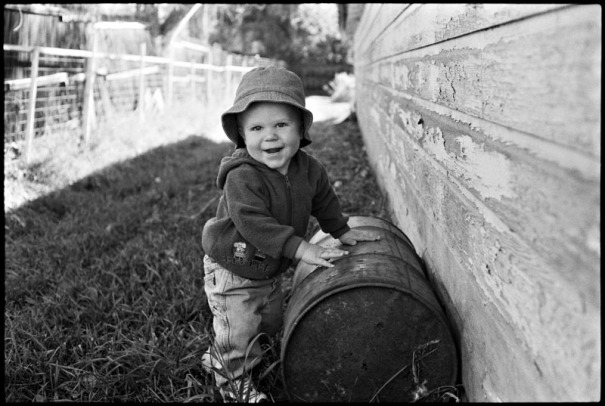
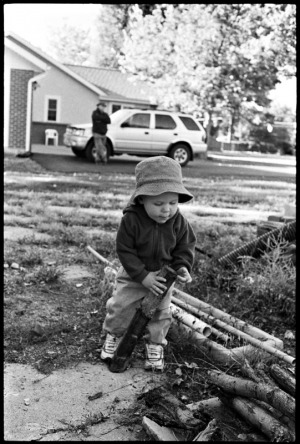
Kids are resilient. Ten minutes before I shot this series of pictures, Jaxon managed to fall and bang his forehead on the asphalt. I would have been laying in bed for a week. He cried for about thirty seconds, and then wanted to get down and play. We watched as the bruise started to come out on his forehead, and I went back to taking pictures. This was something important to document, as a toddler he is pretty much a walking bruise. That’s just who he is at this point in his life.

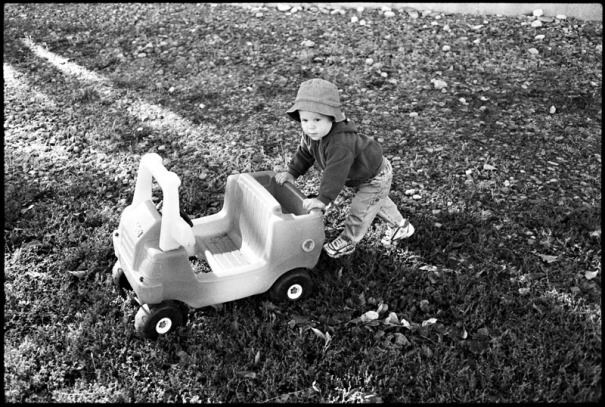
Jaxon never seems to get too worried about it. He has more important things to think about. Like airplanes flying overhead and wagons to pull and climb on. I guess he figures bruises are just the price you pay for the freedom to walk around and check things out.

I really like the authenticity of these pictures. The bruise, the clothes, the hair, the setting, it all feels real – because it is real. A picture doesn’t have to be staged and styled and manicured to be beautiful. Life is what it is, and I like to document it. Let me know if you have a life you would like to have documented.

You can click on any of the images to see them larger. Enjoy…


Tech Info:
Open shade late in the day
Nikon D70s
Nikon 35mm f2
f2.8 | 1/400 | ISO 200
Adobe Camera Raw
Photoshop Unsharp Mask to boost midtone contrast

Documenting Your Family | Photo Tips | Get On Their Level

One of the keys to getting great pictures of kids, is getting down on their level. This simple step accomplishes a few things…

  • It opens your eyes to the way children see the world, and helps you relate to them.
  • It can give interesting backgrounds that mostly go ignored by us grownups.
  • It helps hold kids’ attention, as they are unaccustomed to having the big people look them in the eye.
  • It makes the little ones smile, they love watching us struggle to move around for a change.
  • It lets your camera really see into a child’s eyes, rather than looking up through their eyelashes

So what does moving down to the kid’s level mean from a technical perspective? Since you are lower and pointing your camera up, you are likely to have some sky or brightly lit background in the frame. This can trick your camera’s light meter and cause the images to be underexposed. Just be aware of this as you are shooting. If your camera allows, it might be a good idea to dial in some exposure compensation.

Another thing to consider is your clothing. When I work with kids, I almost always wear jeans or shorts because I am invariably kneeling, sitting or rolling around on the ground. This makes kids laugh, and keeps the atmosphere light, but it is hard on dress clothes.

Below are some pictures from a shoot with Molly. You will notice that I was moving up and down as I was shooting these. I was also moving in and out (with my feet, since I don’t really use zoom lenses). I think this is an important point – allowing the kids to move around, and you yourself moving around, keeps everyone animated and engaged.

You can click on any of the images to see them larger. Enjoy…

Tech Info:
Natural Light
Nikon D70s
Nikon 35mm f2
Adobe Camera Raw – no actions or filters

Colorado Wedding & Portrait Photography | New Business Cards

Up until recently, I have been using business cards designed in Photoshop, printed on photographic paper and cut down to 2″ X 3″. While I liked the way these cards reproduced pictures, they were not great for text, were thin, only allowed printing on one side and were slightly smaller than standard business cards.

Using lessons learned from creating my first business cards, I went ahead and designed a more traditional card and had it printed on heavy-weight recycled paper. The new design utilizes both sides of the card. The front shows my standard logotype as well as contact information and the short message “fine art documentary photography of kids, seniors, weddings & families”.

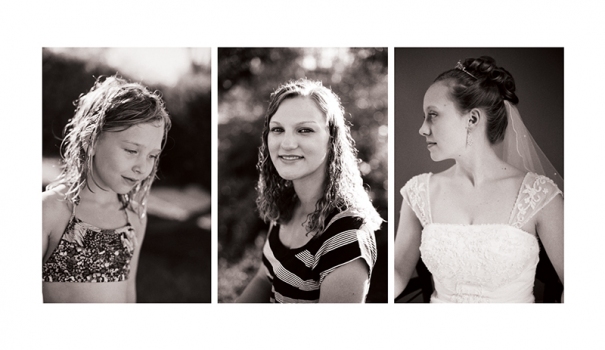
The back of the card contains three vertical images, one of a young girl (to represent child and family photography) another of a high school senior, and the last showing a bride. All three images are in black and white and were shot in my signature style – on location, available light, natural expressions, etc. Coincidentally, all three images were shot with the same camera and film combination – Nikon F100, Legacy Pro 400 (Fuji Neopan 400) film.

So take a look at these samples and let me know what you think…

Tech Info:
Business card examples
Cards printed on 100lb recycled stock

Images all photographed using
Nikon F100
Legacy Pro 400 film (Fuji Neopan 400)

Arvada, CO | Documentary Portraits | Family Pumpkin Picking

Halloween is here again! I hope you have your pumpkin picked out.

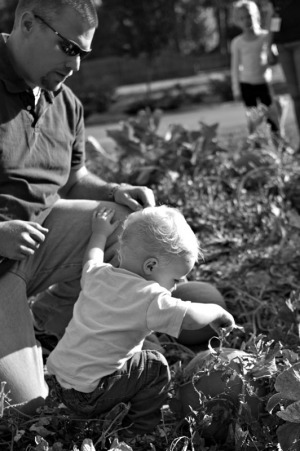
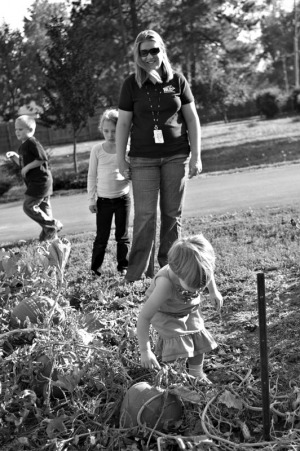
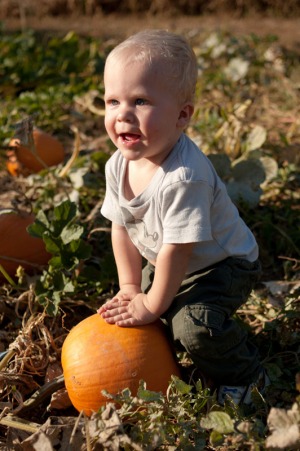
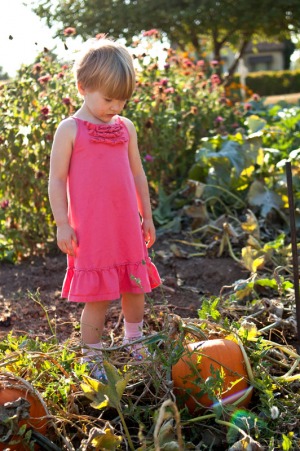
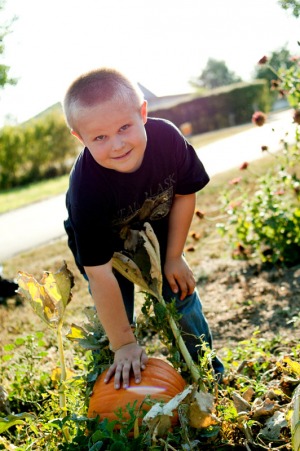
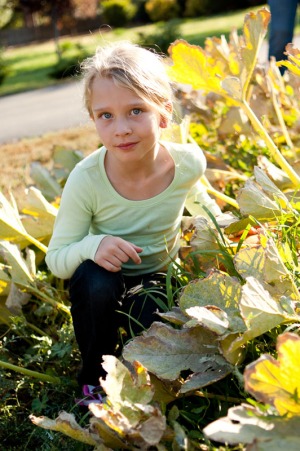
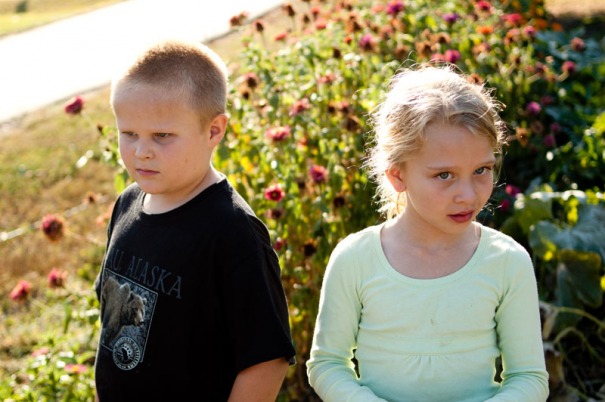
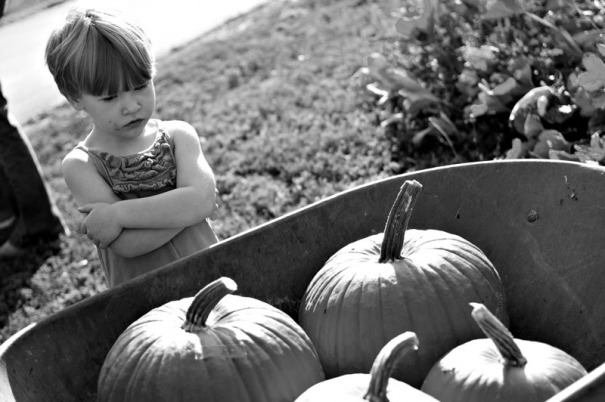
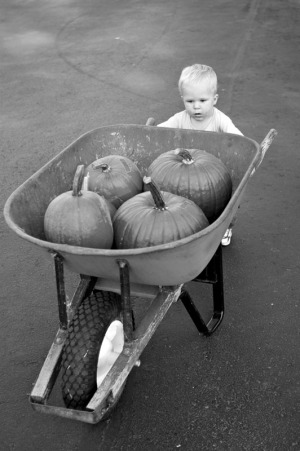
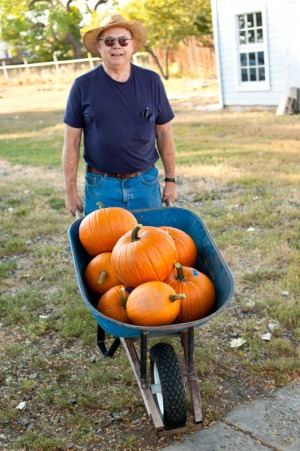
Below are some documentary pictures from our pumpkin picking adventure this fall. The whole crew went over to my Mom and Dad’s place where Dad has a big garden with a small pumpkin patch. The kids all got to pick out a couple of pumpkins and there were still a few left over to give to some of the kid’s friends.

I really like these pictures for a few reasons… first is the light. We did this in the late afternoon, so the light was warm and directional, perfect for these kinds of pictures. If you are scheduling a family event that might provide good photo-ops, always try to take advantage of the light at the end of the day.

Another thing that I like about these pictures is the authenticity. Everyone looks real. Julie and Luke just got out of work, so they are wearing their work clothes. Dad is pretty much always dressed just like this – jeans, pocketed t-shirt and a big hat (in the winter he adds a flannel shirt). It’s the end of the day, so the kids hair and clothes are messy, and they have stuff all over their faces – just as you would expect. These pictures really document our family, not some idealized version, our real family.

This kind of authenticity is what I always strive for in my documentary portrait sessions – family fun, real locations, natural light, comfortable clothing – perfect. So if you have a family event coming up that could benefit from some authentic documentation, give me a call.

You can click on any of the images to see them larger. Enjoy…

Tech Info:
Late afternoon light
Nikon D70s
Nikon 35mm f2.0
Adobe Camera Raw

Arvada, CO | Documentary Portraits | Jaxon Playing Outside

This is Jaxon. He is truly a boy’s boy. He is happiest when he’s eating, sleeping, or playing outside. He loves to run through the rocks, weeds and grass. He loves to play with sticks. And most of all, he loves to push his jeep.

These are documentary portraits of Jaxon doing his thing. For this set of images, I really wanted to show him in his element, so we went outside in the morning, when the light is good, and before he has a chance to get tired and cranky. I pretty much just followed him around and waited for him to do something interesting. He didn’t need any direction, I would occasionally say his name, just to get him to look at the camera.

My camera selection was based on my desire to place Jaxon in context. I wanted it to be obvious that we were outside running around and playing. So I went old school – these were shot using an old fixed lens rangefinder camera from the 1970’s. Notice the soft corners in some of the images. That is one of the great things about using old film cameras and lenses, they each have their own unique look that can really add to the feel of the shots.

One thing I especially like about this particular camera is the fixed 40mm lens. It is close to a standard 50mm, but just enough wider to give more context to the images. However, it is not as wide as a 35mm, which can show distortion in portrait images. 40mm really seems to be the sweet spot, at least for me.

You can click on any of the images to see them larger. Enjoy…

Tech Info:
Canon Canonet QL17 GIII
Fixed 40mm f1.7 lens
Legacy Pro 400 (AKA Fuji Neopan 400)
Ilford Ilfotec DD-X (7min @ 20C)

Camera Scans
Sigma SD9
Sigma 50mm f2.8 Macro
Photosolve Xtend-a-Slide

Documenting Your Family | Photo Tips | It’s Your Frame, Use It

  Probably the most famous documentary photographer of all time was Henri Cartier-Bresson. He was best know for images that capture the “decisive moment” (a phrase that he coined). And while his images certainly embody this idea, I think there is another aspect of his work that is too often overlooked – his conscious choice about every element that was included in (or excluded from) his frame. He typically worked with a Leica rangefinder camera, meaning he was not looking through the picture taking lens, but he was still able to beautifully frame his photographs. Neither leaving in extraneous elements or omitting important aspects of the image.

When you are out making pictures of your family, it is important that you be conscious of what is in your frame. Notice that I wrote making pictures, as opposed to taking pictures. That is what you are doing, you are making the decisions about what you include in your frame. Include elements that add to the story or give context, exclude elements that are unnecessary or distracting.

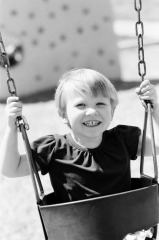
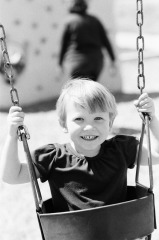
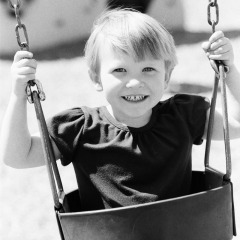
In the two pictures above, you will notice that one works and one doesn’t. The person walking through the background in the second image is distracting and really should not be there. For these shots, I had made the conscious choice to stop the bottom of the frame on the black rubber of the swing and not include Molly’s legs. This did a few things, it helped center her face in the frame, it allowed me to add a lot of the chains to help explain what is going on, and it shows a lot of the climbing wall in the background, adding context to the image. Now it takes a lot longer to write (or read) all of that than it does to actually come to the decision. After you start thinking in this way, it becomes pretty instinctual.

So what went wrong with that second frame? After I had made my decisions and framed the shot, I could only shoot one frame every time Molly swung into the proper position. In the first frame it worked perfectly – Molly swung into frame, I clicked the shutter – bang! – properly framed and focused image. Immediately after I made this image, a woman walked into frame from camera right. I was so busy concentrating on Molly’s position, I didn’t even notice… Until just after I pressed the shutter. No great loss, it was only one frame and I could even crop it to a square and exclude the background if I wanted to. Also, this was a pretty complicated situation. Normally it is pretty easy to look over your entire frame before clicking the shutter.

The trick to nailing this technique is simply to make it a habit to look around your frame before making the picture. I always start by deciding what is my center of interest (the most important thing in the picture) and then placing it where I want it in the frame (generally NOT dead center). I then let my eye do a clockwise lap of the frame edges. This picks up anything weird going on in the rest of the image. I am especially watchful for things that might be cut-off or jutt into frame.

The above process will seem slow at first, but as you get used to it, you will pick up speed and before long it will become a habit and you won’t even realize you are doing it. This habit should really improve the quality of your pictures, especially if you are using a point-and-shoot digital camera where everything is always in focus.

So give this technique a try and let me know what you think.

P.S. Here is the second image cropped to exclude the distracting background…

Tech Info:
Nikon F100
Nikon 50mm f1.4
Legacy Pro 400 (AKA Fuji Neopan 400)
Richard Photo Lab
Sterling, CO | Documentary Portraits | Bye Bye Summer

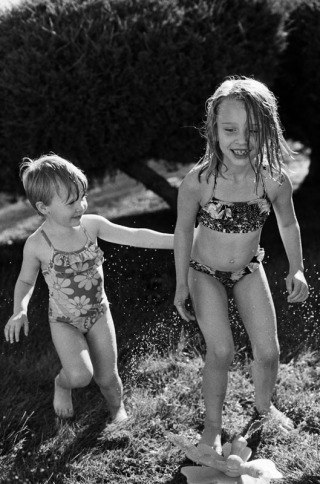
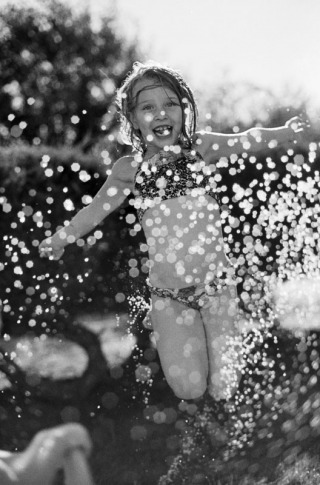
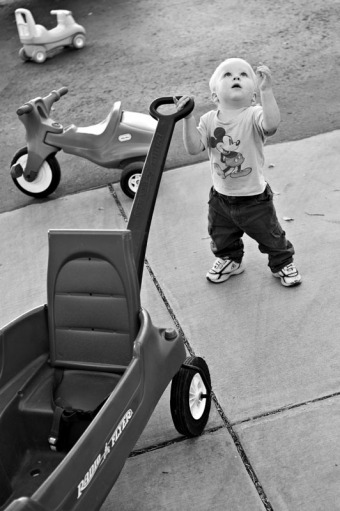
Last night, we had our first frost of the season here in the Denver metro area. I thought I would take the opportunity to look back at some fun documentary portraits from the summer. These were photographed at my grandmother’s house in Sterling, CO. The girls wanted to go out and play in the sprinkler and I wanted to get some pictures of them, so it worked out for everybody.

As you can see, they had a great time and I really like the pictures we were able to make. This was a great location for the shoot because I remember doing the same thing in the same location when I was a kid. It has meaning for me, so it adds something special to the images.

We had nice late afternoon light that I was able to use to rim-light the girls and back-light the water droplets. This makes for really interesting light in the images – soft on the skin and faces, but nice and contrasty on the edges and in the background. Also, because I was shooting black and white film, I was able to retain detail in the bright highlights and in the sky. If these same pictures had been shot on a digital camera, there is a good chance all of the highlight detail would have been lost.

The setting, the light, the “props”, the “wardrobe”, it all screams summertime and fun. This is what I go for in my documentary portrait shoots. Capturing a great memory, not just what the kids looked like at a certain moment in time.

You can click on any of the images to see them larger. Enjoy…

Tech Info:
Nikon F100
Nikon 50mm f1.4
Legacy Pro 400 (AKA Fuji Neopan 400)
Ilford Ilfotec DD-X Developer (7min @ 20C)

Camera Scan
Sigma SD9
Sigma 50mm f2.8 Macro
Photosolve Xtend-a-Slide

Documenting Your Family | Photo Tips | Make Some Prints

I wanted to use today’s post to remind you to print your pictures. With the advent of digital photography, we are all shooting far more pictures than we ever have in the past. But I fear we are actually printing far fewer.

I know I am guilty of this, but it is something that I am consciously working on. I have actually moved back to film cameras for a lot of my photography, specifically so I can have a tangible document (a negative). It still makes me nervous that after shooting something on a digital camera, and going through all my back-up procedures (a topic for a future post), I really only have a bunch of ones and zeros on a magnetic disk (or two or three). My feeling is that if you don’t have a print, you don’t have a photograph. For this reason, all of my wedding and family portrait sessions include a complete set of real photographic proof prints.

One of the great things about digital photography is our ability to pick and choose the pictures we want to print. If you shoot fifty pictures at a birthday party, you don’t need to print all fifty, just pick your five favorites and print them. But, don’t forget to print them. The follow through is where we get into trouble.

I would recommend setting up an account with flickr (did you know you can order prints through flickr?), Costco, Adoramapix, Winkflash, Snapfish, or any of the other online print providers and start uploading your favorite pictures.  A quick tip  – the printing is cheap compared to the shipping, so wait until you have enough images to make it worth the shipping costs, or if you live near a Costco, you can order the prints online and pick them up at the store.

When documenting your family, it is critically important to have these memories archived in a tangible way. If you are shooting digitally, you no longer have negatives to fall back on, so prints are your best way to ensure that the memories you have captured will be visible for generations to come.

Tech Info:
Sigma SD9
Sigma 50mm f2.8 Macro
Window light
ISO 100, f4.0, 1/60

Documenting Your Family | Photo Tips | Get Closer

“If your pictures aren’t good enough, you’re not close enough.” – Photojournalist Robert Capa

Robert Capa was a war photographer who was well known for always being right in the middle of the action. He was killed by a landmine while photographing the First Indochina War, on May 25, 1954. His quote above is a reminder for us to get physically closer and become more intimate with those we are photographing. Capa did not accomplish this through the use of long lenses (not in common use prior to 1954), but through proximity.

Getting closer accomplishes a few things:

It lets us understand what is going on and lets our subjects get used to us being around and having a camera. If you stand on the edges of the action and use a long lens to capture images, this will often draw attention and even suspicion. If you are comfortable and involved, people will start to forget about the camera and you can document truly candid moments. Photographing your own family makes this really easy, you are a supposed to be there, all you have done is add a camera to the mix.

Getting closer and using a wide angle lens will allow you to incorporate background into an otherwise intimate photograph. This gives the image a sense of place and tells the viewer what was going on at the time the picture  was captured. This type of picture is often called an environmental portrait.

If you get close while using a normal or short telephoto lens (the max I routinely use is an 85mm) you are able to remove much of the background or turn it into a pleasing blur. This focuses the viewers attention on your main subject and can make for a powerful photograph.

Getting close and being involved with your subjects gives you far more options in terms of lighting and background/foreground elements. If you are standing back and shooting with a long lens, you are pretty much stuck with whatever light direction and elements happen to line up in your frame at the time the shutter is tripped. If your subjects are comfortable with you, and you can move in among them, you can position yourself so there is attractive light, a cool foreground element in the frame, or nice tones/colors in the background. The choice is yours, it is not being dictated by your location or your long lens.

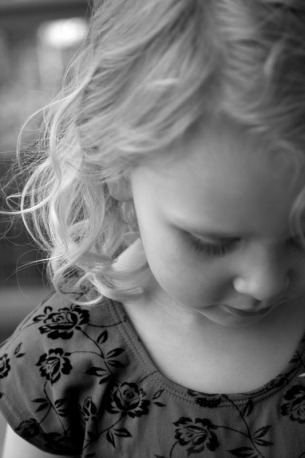
Finally, a note on cropping. As you can see in the image above, you do not always have to show a person’s whole head in a close up portrait. In this portrait, I was really interested in Emma’s wavy hair and the flower pattern in her shirt. I came in close with a 50mm lens (equal to an 85mm on 35mm film) and only shot the right side of her face and included her hair and her shoulder. What did this technique accomplish?  It brought attention to the elements that I was interested in documenting, it excluded the dark shadows on the left side of her face, and it created a pleasing off center composition. Also, the distracting background was reduced to a soft blur.

I hope you find these tips helpful, give them a try and let me know what you think.

Tech Info:
Sigma SD9
Sigma 50mm f2.8 Macro
1/350 sec, f/3.5, ISO 100
Converted to B&W in Adobe Camera Raw

Documenting Your Family | Photo Tips | Turn Off That Flash

Red eyes, harsh glare, shiny foreheads, ugly reflections in the window – these are not the things memories are made of. That little flash built into your camera is the number one culprit in bad photographs. It’s intrusive and distracting, pulling attention away from the scene being photographed and toward the photographer. Think of it as a last resort. If you absolutely have to get a picture, and it is really dark, go ahead and use it. But how often is it that dark?

With the newer crop of digital cameras allowing the use of high ISO’s, and ever improving lenses that open up to wider apertures, we can shoot in dimmer and dimmer light without resorting to on-camera flash. Below are some tips to help you get the best photos you can using only available light:

  1. Crank up that ISO. You will see a lot written about the horrors of noise in your digital files, and you will see noise, no doubt about it. But most everyone has moved on to cameras with 8, 10, 12, or even 14 megapixels. This is much more resolution than you actually need for a 4X6 or 5X7 print. So even if the noise looks bad blown up huge on the monitor, it will be much less noticeable in an actual print.
  2. Brace yourself. When you are not using flash, you will have to use slower shutter speeds to let enough light hit the sensor to capture a properly exposed image. The problem with slower shutter speeds, is movement. If the camera moves while the shutter is open, you will get a blurry picture. Your mission is to minimize this movement. Stand as if you were on a moving train/bus, feet apart and knees slightly bent, and squeeze your elbows against your sides as you hold the camera. Ideally, there would be a wall nearby that you could lean against. Finally, gently press the shutter release, don’t mash it.
  3. Anticipate the action. Just like camera movement, subject movement will cause blurry pictures. The best way to counteract this is to pre-focus your camera on your subject and wait for a slight pause in their motion. This is especially important with kids, they are little balls of energy. Also, pictures with motion blur can be really interesting. They are much better than pictures that are simply out of focus. Embrace this.
  4. Learn to love black & white. When shooting with the available light, you are likely to have orange light from standard bulbs, green light from fluorescent bulbs, and blue light from the window all mixing together in one scene. Neutralize all these color casts by simply switching the image to black and white. One added benefit, the noise mentioned in tip one (above) looks much more like classic film grain once the image is converted to black & white.

As you practice these techniques, you will get much more comfortable shooting without the flash. You should also start to get more interesting images that look more like something you would see in a newspaper or magazine and less like a snapshot in a photo album.

Tech Info:
This is certainly not the greatest photograph that I have ever made, but I think is does a good job of illustrating the points mentioned in the blog post. Just click on the image to see it larger.
Nikon D70s (This is an old 6 megapixel DSLR)
Nikon 35mm f2 lens (An inexpensive fixed, non-zoom, lens that opens to a wide aperture)
ISO 1250 (This camera maxes out at ISO 1600)
No Flash
Mixed lighting – Window, standard light bulbs & fluorescent tubes
Converted to B&W in Adobe Camera Raw